Debug a Flutter iOS app on your iPhone from Windows, with hot reload
This tutorial walks you through debugging a Flutter app on an iPhone from Windows, with Dart breakpoints and hot reload, adding camera and photo library plugins, and building an .ipa ready for the App Store. It’s for developers who write Flutter on Windows and don’t have a Mac. You need an Apple Developer account, an iPhone and a USB cable, and you need to have installed KXBuild.
Why flutter build ios doesn’t work on Windows
The iOS commands in the official Flutter tools only run on macOS. On Windows, flutter build ios reports that it’s macOS-only, and flutter run doesn’t list your iPhone.
With KXBuild, KXBuild builds and runs the iOS side, and every other flutter command works as usual. flutter create, flutter pub add and flutter test are unaffected, and you still use flutter run for Android.
Set up Flutter
Install the Flutter SDK as described on the Flutter website and add the flutter command to PATH. Open a new terminal and check that this prints a version.
1flutter --version
Install the Flutter extension from the VS Code Marketplace, which installs the Dart extension too. Dart breakpoints and hot reload come from the Dart extension. If it’s missing, KXBuild offers to install it the first time you debug.
Create a project
To use an existing project, open the Flutter project’s root folder (the one containing pubspec.yaml) in VS Code with File > Open Folder…, or drag the folder into VS Code. Otherwise, create one with Flutter’s own command.
1cd D:\work
2flutter create --org com.example myflutterapp
–org sets the iOS bundle ID. The command above produces com.example.myflutterapp. Use your own reverse domain, and register the App ID with the same value in your Apple Developer account later.
You can also create the project from a KXBuild template. Use either of these.
- VS Code extension. Run KXBuild: New Project from the Command Palette and pick the “Flutter App” template.
- Command line. Run
kxbuild project create -t flutter_app -n myflutterapp -o D:\work.
Run doctor
Do this first whenever you open a project for the first time. Doctor checks your Flutter setup and prepares the iOS project. Without it, the build fails. Use either of these.
- VS Code extension. In the title bar of the KXBuild view, open the ··· menu and run Doctor (fix environment).
- Command line. Run the command below.
1kxbuild doctor D:\work\myflutterapp
A freshly created project has no plugins that need CocoaPods, so you can start debugging right after doctor. Once you add plugins with native code, there’s one more step, covered in Add camera and photo library plugins.
Connect your iPhone
Debugging on a device requires signing. First create an Apple Development certificate and a Development provisioning profile that includes this iPhone in your Apple Developer account, and put them in the keychain folder. See Certificates and signing.
Connect the iPhone with a cable and go through these steps once. After that, it works whenever you plug it in.
- When the device node in the KXBuild view says “click to set up”, click it to install the Apple device drivers. You’ll approve one administrator prompt.
- Unlock the iPhone and tap Trust in the Trust This Computer prompt.
- On the iPhone, go to Settings > Privacy & Security > Developer Mode and turn it on. The iPhone restarts once. The switch only appears after the iPhone has been connected to a computer.
- Click the iPhone under the device node in the KXBuild view to make it the active device.
For other cases, see Set up your device.
Start debugging
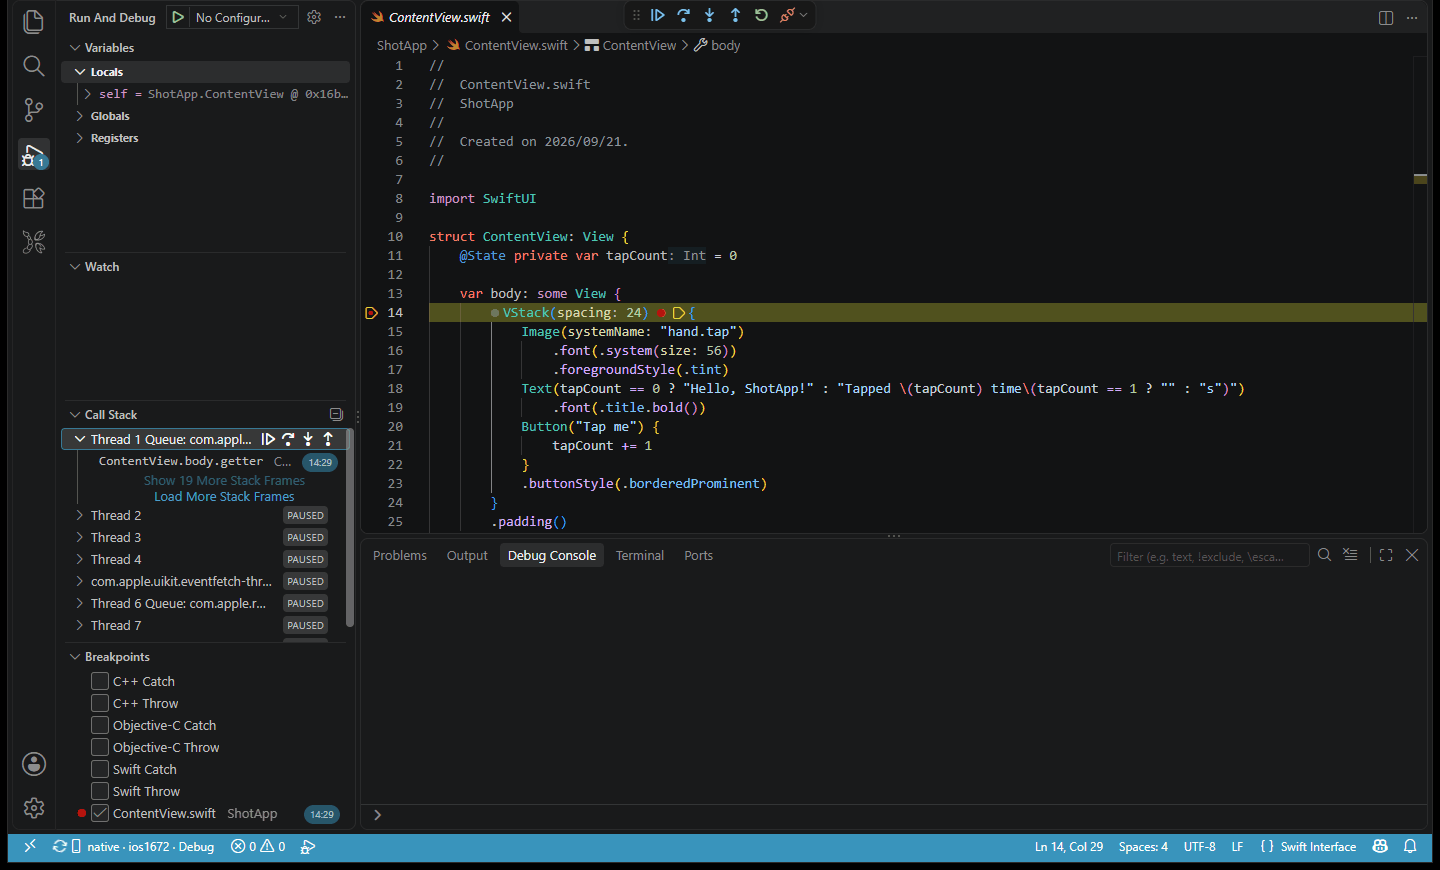
Set a breakpoint in lib\main.dart, for example inside the _incrementCounter method, and press F5. KXBuild builds, signs, installs and launches the app. The native debugger attaches first, and once the app starts, the Dart debugger attaches automatically. The debug toolbar shows two sessions, one for the native side and one named “Flutter (Dart)”.
Tap the plus button on the iPhone and VS Code stops at the Dart breakpoint. Variables, the call stack and watch expressions are all in the standard debug views. You can set breakpoints in the Swift or Objective-C code under ios\Runner at the same time.
The first time you debug on a given iOS version, KXBuild downloads its device symbols. It’s a few GB and takes around ten minutes or more, but only once. Progress shows in a notification.
Hot reload and hot restart
Once the Dart session is attached, hot reload works the same as on Android.
- Save Dart changes with Ctrl+S to hot reload automatically. Page state is kept.
- The lightning button on the debug toolbar triggers hot reload manually.
- If hot reload doesn’t pick up a change, such as to main() or the initialization of global state, run Flutter: Hot Restart (from the Dart extension) in the Command Palette.
When you write code that calls between Dart and native, such as a MethodChannel, set breakpoints on the invokeMethod call in Dart and on the handler in ios\Runner\AppDelegate.swift. In a single run you can follow the arguments from Dart to Swift and the result back again. The app’s native log goes to Output > KXBuild Console.
Hot reload only updates Dart code. If you change native code under ios, Info.plist, or add a new plugin, stop debugging and press F5 again for a full build. The Restart button on the debug toolbar doesn’t recompile.
Add camera and photo library plugins
Plugins such as camera and image_picker include native iOS code. Besides the Dart code, they need three extra steps. The example below uses image_picker.
Add the dependency and run doctor again
1flutter pub add image_picker
After adding the dependency, run doctor again so the iOS project picks up the new plugin.
Install pods
If the plugin needs CocoaPods, install its dependencies in the ios folder after doctor. Doctor doesn’t do this for you.
1cd ios
2pod install
From then on, build ios\Runner.xcworkspace, not Runner.xcodeproj. For more on CocoaPods, see Develop iOS apps with CocoaPods on Windows.
Add usage descriptions to Info.plist
iOS requires you to state in Info.plist why the app accesses the camera, photo library or microphone. Without these entries, the app crashes as soon as it makes the call, and App Review rejects it. Per the image_picker documentation, you need the three keys below. The camera plugin needs the camera and microphone keys.
| Key | When you need it |
|---|---|
| NSPhotoLibraryUsageDescription | Picking images from the photo library |
| NSCameraUsageDescription | Taking photos or recording video |
| NSMicrophoneUsageDescription | Recording video with sound |
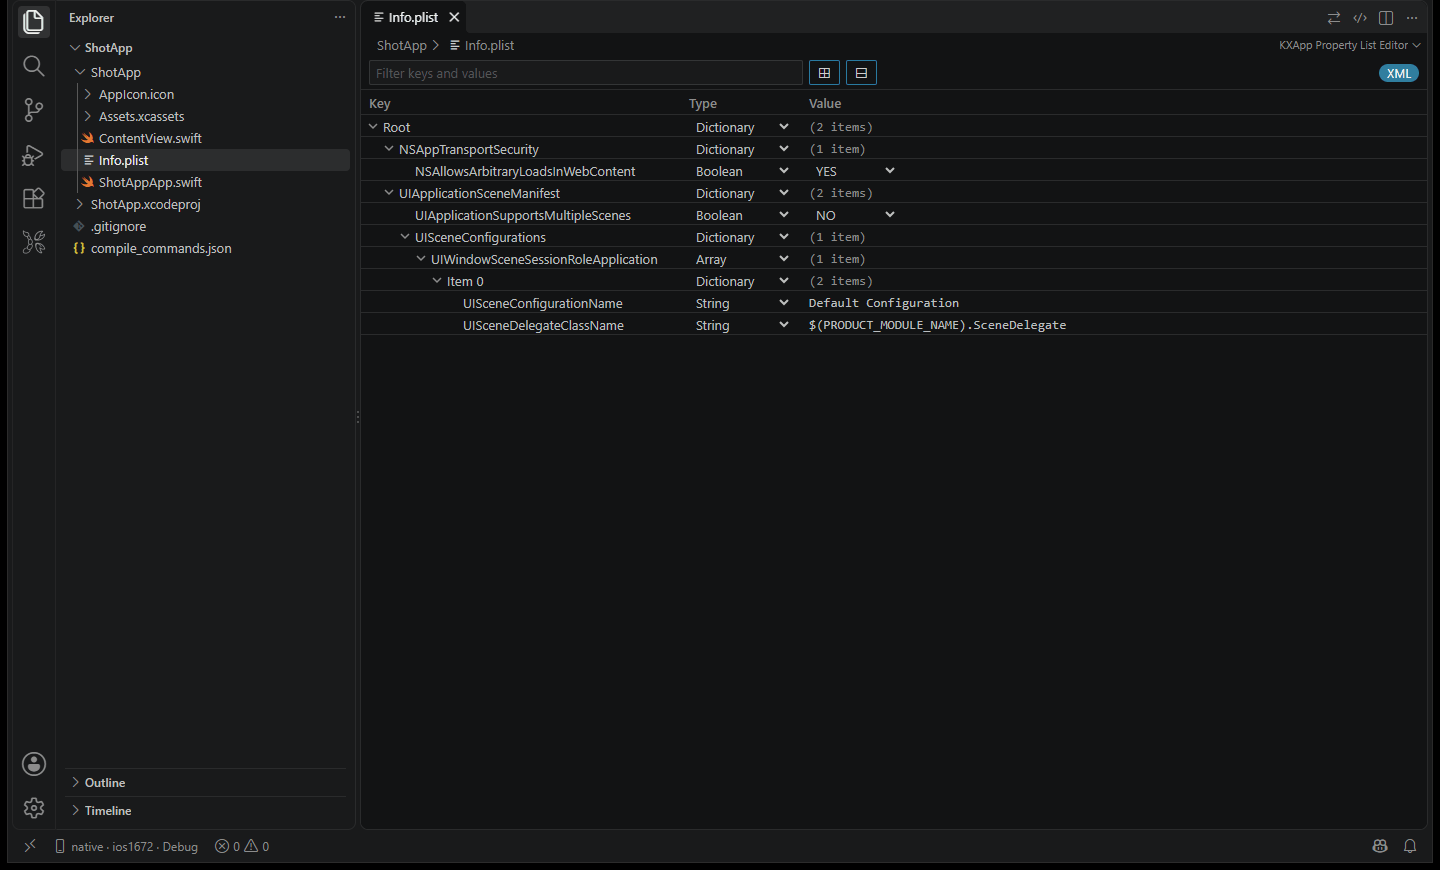
In VS Code, double-click ios\Runner\Info.plist and KXBuild’s Property List Editor opens it as a table. Right-click any row and choose Add Row, enter the key name from the table, set the type to String, and write a sentence for the user as the value, such as “Used to take your profile photo”. Save with Ctrl+S.
After all three steps, stop debugging and press F5 again. The first time the app uses the camera or photo library, the iPhone shows a permission prompt with the text you just wrote.
Change the app name and icon
The name shown on the Home Screen is CFBundleDisplayName in ios\Runner\Info.plist. Change the value in the Property List Editor. To change the bundle ID, right-click the Runner target in the KXBuild view, choose KXBuild: Edit Target Settings, and edit Bundle Identifier on the General page. See Project Settings Editor.
The iOS icon is the AppIcon set in ios\Runner\Assets.xcassets. In the Explorer, right-click Assets.xcassets and choose KXBuild: Open Asset Catalog. Select AppIcon, then use Fill All Sizes from 1024×1024 Image… and pick a square PNG of at least 1024 pixels. Every size is generated at once. The 1024 App Store icon can’t have an alpha channel, and the editor flags it if it does. See Asset Catalog Editor.
Build a Release .ipa
Update the version
A Flutter project’s version is the version field in pubspec.yaml, for example 1.0.1+2. The part before the plus is the version shown on the App Store, and the part after is the build number. Each upload to App Store Connect needs a higher build number than the last. After changing it, run doctor again so the iOS side uses the new version.
Build with the Release configuration
The keychain folder needs an Apple Distribution certificate and an App Store provisioning profile. Use either of these.
- VS Code extension. Switch the configuration to Release in the Build configuration node of the KXBuild view, then run KXBuild: Build from the Command Palette.
- Command line. Run the command below in the project root.
1kxbuild build .\ios\Runner.xcworkspace -c Release
When the build finishes, ios\build\Runner.ipa is ready to upload. The Dart code in a Release build is precompiled, so the app runs normally when you open it from the Home Screen.
Upload and submit for review
Create the app in App Store Connect first, with the same bundle ID as the project. On Windows, sign in to your developer account in Appuploader and upload the .ipa. When processing finishes, install it from TestFlight to check it on your iPhone, then submit it for review. For the full steps, see Release and App Store submission.
FAQ
Dart breakpoints don’t hit, only native ones do
The Dart extension isn’t installed. Install the Dart extension (Dart-Code.dart-code) from the Marketplace and press F5 again.
Opening the Debug build from the Home Screen crashes or shows a blank screen
This is a known Flutter limitation on iOS. A Flutter app in Debug mode can only be launched by the debugging tools, not from the Home Screen without a debugger. To give the app to someone else, build a Release version.
The build can’t find a plugin’s header or module
You’re using a plugin that needs CocoaPods but haven’t run pod install, or you’re building Runner.xcodeproj. Run pod install in the ios folder and build Runner.xcworkspace from then on.
The build fails in the Run Script phase
Flutter isn’t set up for this project yet, which often happens right after you switch Flutter versions or pull the project. Run doctor again with the project path.
Breakpoints stop in assembly or at the wrong line
You’re debugging the Release configuration, and optimization moves breakpoint locations. Switch back to Debug in the Build configuration node. It also happens while device symbols are still downloading, so wait for the notification to say the download is done.
For other errors, see Troubleshooting.